Plastic bottles are a wonderful and versatile material that serves many purposes. Not only do we store liquids in them, but the container can also be useful for all kinds of crafts. Some may be purely decorative, but others are useful in practice. One way to use plastic bottles is to turn them into a broom. This is a useful device that you need for your home or garden. Instead of buying a broom from the store, you can spend an hour or two making one.
Everyone has the material, but all you need is a simple set of tools. Let's find out how to make your own broom from plastic bottles step by step.
Tools and materials for work
It doesn’t take a lot of money to make a bottle broom with your own hands. All the components are in the house, so you don’t have to run to the store. The set of tools is simple, and even children can work with them. What will you need for the job? Here is this small list:
From such a set of simple things, you get this practical broom from a plastic bottle.

Now that you have everything you need, you can start creating your own product.
Creation technology
It will take you about an hour to produce, give or take. There is nothing difficult about the work. The main thing is to follow the instructions and do the work carefully. For your convenience, we have made step-by-step instructions to help you. So, let's look at the creation step by step:
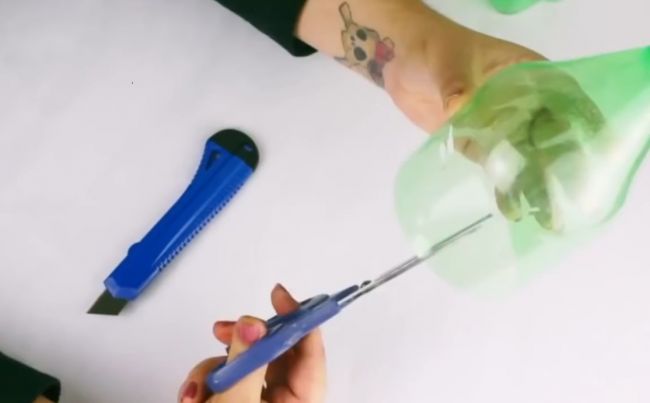
- Take the first bottle and a utility knife. It should be sharp. Cut off the neck from it, stepping back a few centimeters from the top.

- Cut off the bottom of the plastic container in the same way.
Advice! Work carefully to avoid injuring your hands. Plastic is a soft material, so it lends itself well to processing.
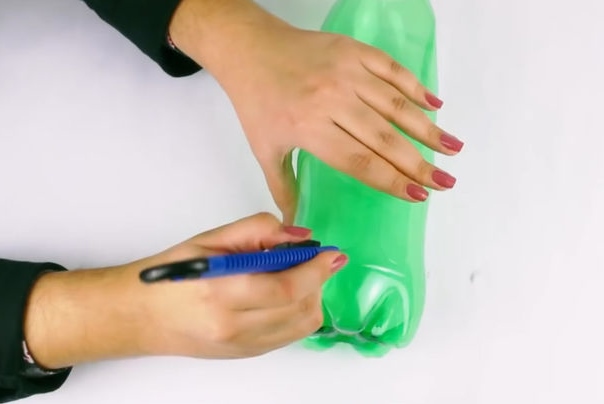
- Now you need scissors. Each broom has twigs or stems. Your job is to create these stems. Using scissors, start cutting the workpiece lengthwise, from bottom to top. The width of each strip is approximately 0.5-1 cm. Do not cut it to the very end. Move just above the middle, leaving about 6 cm at the top.

- Process the remaining bottles in exactly the same way. Leave only two of them untouched. Please note that the more products there are, the thicker the broom bundle will become. It will cope with cleansing more effectively.

- So, at this stage you have 3 or 5 pieces ready (depending on how much you initially stocked), the neck of which is cut off, and the rest is cut into strips. You also have two untouched plastic bottles. Take one of them and, without cutting off the neck, do the same as with the rest.
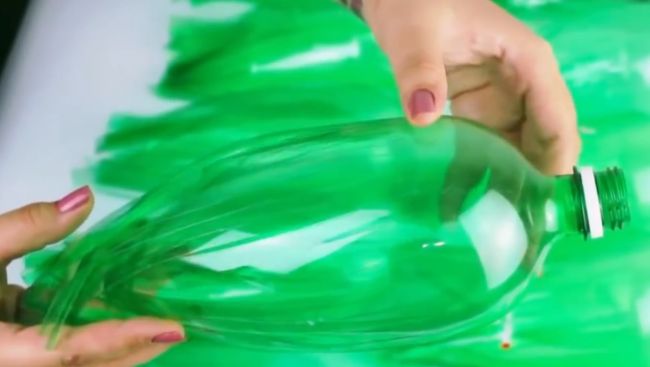
- Your bottle broom is almost ready. Take the blank with a neck and begin to insert it one by one inside each part made without a neck. The product with a neck will fit freely into the prepared hole. Install all workpieces completely.

- Basically, the bottom part is ready. It remains to be bent (flatten) to give shape. But we will not stop there, but will improve it to make it beautiful and practical. Take the remaining bottle, preferably one with a high neck, and cut it in half with a utility knife. We only need the top part.

Advice! Don’t throw away the lower part; you can use it to make a tabletop or hanging pot, a container for pens, an owl or a ladybug.
- In the desired part, use scissors to make two cuts on each side, opposite to each other. Make the cut approximately to the middle of the plastic part.
- The finished part needs to be placed on a blank made from the remaining bottles.
- Using a large nail (50 or 100 mm), sew the product in two places in a horizontal plane. You can use an awl. It takes effort. Insert the wire into the holes formed and firmly tie all the layers together. It should turn out as shown in the photo.

- That's all, the product is almost ready. All that remains is to attach the stalk to it. The stick should fit into the neck of the bottle not loosely, but tightly. To control the thickness, trim it using a regular knife.
- When the stick enters the neck, all that remains is to secure it with nails or screws so that it does not fall out or spin. The nails will securely secure the handle, and the broom will be one piece.
- For reliability, it is better to use not one, but two or three nails. They need to be driven into the neck with the stem inserted. For better fixation, you can use small self-tapping screws.

You have successfully created a device. A do-it-yourself broom made from plastic bottles will do the job perfectly. You can use it to sweep the yard, room, paths, etc. Create several brooms and surprise your friends with your skills. To make it clearer how to properly make a broom from plastic bottles, check out this video.
How can you use regular plastic bottles? They serve not only to store liquid drinks in them, sometimes we make crafts from plastic bottles that are useful in everyday life. Needlewomen and handicraftsmen never miss the chance to turn some unnecessary item into a practical and necessary thing in the household. One of these useful products is a broom made from a plastic bottle, created with your own hands.
Useful homemade product in everyday life
Why might you need such a homemade broom? Naturally, such a broom will not be useful for cleaning rooms, since it will not be able to efficiently collect fine dust or crumbs. But it will be very useful in the garage, in the country, in the yard. This broom is most often used to remove large debris. It is convenient to sweep up dry leaves in the autumn.
What you need to make a broom from plastic bottles
First of all, let's prepare everything that may be useful to us in our work.
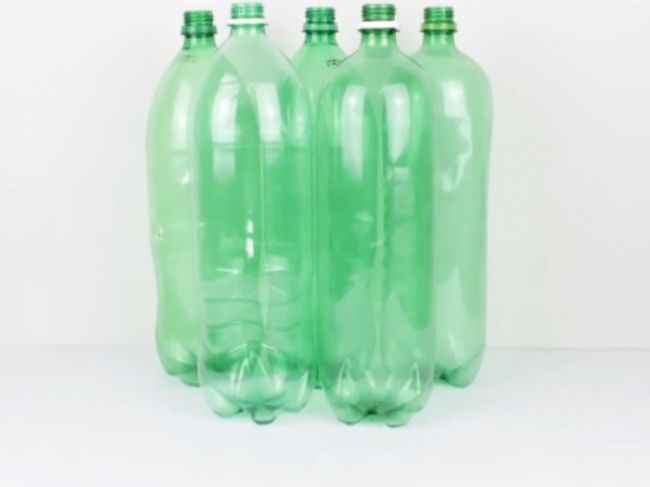
The main material is approximately 6 plastic bottles. Depending on how fluffy you plan to make the panicle, you can use more or less. Some people are happy with a broom of four bottles, while others need eight. Usually two-liter or one-and-a-half liter plastic containers are used: the larger the displacement, the longer the broom's rods will be.
To make a handle, you can take a smooth wooden stick or use a plastic tube. Determine the length of the holder at your discretion, but it is better to make its thickness such that it matches the diameter of the neck of the bottle.
Thick rope, such as string or twine, can also be useful.
You should take care of the tools that may be needed in your work. They will be easy to find in any home. These are sharp large scissors, an awl, nails and a hammer.
How to make a broom from a plastic bottle?
Making such a thing with your own hands is as easy as shelling pears. It seems that even a child can cope with this task. So, we have already prepared everything we need, now let's find out how to make a broom from plastic

- Using sharp scissors, cut off the bottom of each prepared container.
- We cut the entire lateral surface to the point of narrowing into strips 1-2 cm wide. The rigidity and elasticity of the broom will depend on their thickness.
- Now it's time to cut off the neck of all but two bottles.
- We take one blank with a neck and put all the other plastic “skirts” on it. Lastly, we attach the second bottle with a neck.
- The next step is to crumple our broom so that it becomes flat.
- We make several holes with an awl and stretch a rope through them so that the broom does not fall apart. Instead of twine, you can use flexible wire.
- We have an almost finished panicle. But now there is nothing to take it for. The two necks from the inner and outer bottle are what the handle will be fixed to.
- We thread the holder through and secure it with several nails. Try to fix it as securely as possible so that the broom does not dangle during use.
As a result, we got a wonderful broom made from a plastic bottle. You can make this necessary thing with your own hands in 20-30 minutes.
The disadvantage of this product is that it is short. With intensive use, the broom quickly softens and becomes ineffective. But this is not so scary, given the ease of its manufacture and the availability of materials.
Other useful crafts from plastic bottles
You can simply throw away a plastic bottle, many do so, but you just have to want it, and this unnecessary thing turns into a useful thing.

Most often, plastic containers of various sizes are used in gardening. Flower growers use them as flowerpots for plants. Vegetable growers grow seedlings in half-liter bottles cut in half. They can save the trunk of young trees from attacks by wild animals and cover cuttings to root growth. It’s easy and simple to make a kind of lampshade that protects light bulbs outside from rain. If you pierce a plastic bottle in several places with an awl and put it on a watering hose, it will serve as an excellent sprayer when watering.
Using imagination and ingenuity, you can definitely find an original use for a plastic bottle.
Winter is the most wonderful time of the year, which gives you the opportunity to enjoy snow fun to your heart's content! As soon as the first snow covers the tired earth in a white fluffy robe, snowmen immediately appear. Large and small, with hats and buckets on their heads, and in their hands - brooms, shovels and even ski poles! You can’t guess in advance how much imagination their creators have.
Surely there is a snowy figure in your yard, smiling welcomingly at passers-by. What if your child wants to put a snowman in the house? How can we be here? Invite your child to make a three-dimensional snowman out of paper with his own hands for the New Year - and it won’t melt in the warmth, it will decorate the house, and you will spend time in a creative impulse! How do you like this idea? Then prepare the materials from the list and let’s start crafting!
We have to:
- a sheet of white paper;
- colored double-sided paper;
- cocktail straw;
- needle and thread;
- large bead;
- large flat button;
- sequin with holes (small button);
- tinsel, braid or ribbon;
- a simple pencil;
- markers;
- scissors;
- glue.
Manufacturing process:
The list of materials for this craft is very extensive, so it is best to prepare everything in advance.

On a white A4 sheet, draw 12 stripes 20 cm * 1 cm and 10-12 strips 10 cm * 1 cm. Cut the strips from paper.

Draw a round base with legs for a snowman on a white sheet of paper and cut it out of paper.

On long strips, retreat 2.5-3.5 cm and bend the edge.

Start gluing the strips to the base so that the fold coincides with the edge of the part.

Continue gluing the strips, spacing 0.5-0.8 cm from each other.
You should end up with a kind of “sunshine”.

Pierce the needle in the center of the glued strips and bring it out to the back side. Thread a button or sequin through.
Bring the needle and thread to the other side, securing the sequin.

Cut a part of the cocktail tube about 7-8 cm.
Thread the needle and thread into the tube. Lower the tube to the base.

Step back about 1.5-2 cm from the edge of the strips and pierce them again with a needle.

Do this with all the stripes. You will get a round snowman body.

Pierce a stack of short strips with a needle at a distance of 1 cm from the edge.

Lower the strips to the end of the thread. Insert the second part of the tube, 4-5 cm long.

Pierce the opposite edge of the strips, moving 1 cm from the edge. You will get a round snowman head.

Sew a hat button onto the snowman's head and secure it with a bead. Make a loop and tie 2-3 knots over the bead.

From white paper, cut out two circles for the eyes and two for the handles. Outline the edges of the eyes with blue and draw the pupils in black. Cut out a carrot from orange paper, and a broom stick from brown paper. Cut out a long rectangle from black.

Glue the eyes and draw eyelashes. Glue a carrot and draw a smiling mouth.
Make frequent cuts on the black rectangle, leaving 0.5 cm from the edge. Wrap it in a roll and tie it at the bottom with thread. Lightly fluff the ends, rounding the edges with scissors. Glue the brown stick - the panicle is ready.
Place the broom in the snowman's hands and glue everything to the body.

Wrap a bright scarf made of tinsel or ribbon around your neck.

Hurray, the three-dimensional snowman with a broom is ready!
Look what a charming snowman we have made! All that remains is to find a worthy place for it on the holiday tree, garland or New Year's composition. You can also make a cheerful group of snowmen and put musical instruments or gifts in their hands. Upcoming holidays!
You never know what you might need a magic broom for! Therefore, it is very desirable that it be in every home where there are children of suitable age. The child knows what to do with it, no doubt about it. The main thing is to provide him with useful equipment.
Our master class shows how to make a magic broom from scrap materials: a piece of plumbing pipe and T-shirt bags.
In order to make a magic broom, you will need:
40-60 packages of T-shirts;
2-4 paper clips;
large scissors;
base stick (in our case, a plumbing pipe, but a stick from a protective grille of a crib, a mop handle, etc. will also work).
And for decoration and camouflage:
a little fleece or any other piece of fabric;
a piece of lace;
needle with thread.
Don’t skimp on time either - no matter how much you want to speed up the process, you still won’t get it done in 10 minutes.
Let's prepare the base stick: our plumbing pipe required careful straightening. Next is the matter of cutting the bags.
For a very fluffy broom, 60 bags are enough. For a moderately shaggy broom, 40 will be more than enough.
In our case there were 60 packages. We divide them into 3-4 stacks of 20 or 15 bags, respectively. Take the first stack and fasten the bottom of the bags with clamps.

After that, we cut off the excess parts: handles and suspension, in a straight line.

Using large scissors, make cuts along the bag from top to bottom, leaving an uncut space equal to the width of the clamp. How wide should the “villi” be? 1 to 2 cm wide broom bristles will look neat.

We cut the remaining stacks of bags in the same way.
Carefully take the first stack and apply the uncut edge to the end of the stick. The tip of the base should reach the cut “hairs” so that the broom does not fall apart at the most inopportune moment. The edge of a stack of bags can be immediately secured to the base with a piece of tape.

We wrap the entire package cutting very tightly around the base.

They wrapped it and carefully fixed the entire structure with tape, overlapping, with a transition to a stick. We wrap the remaining cut stacks of bags in the same way.

If you think that the work is almost over, you are mistaken. Because the work has just begun. And this will be a very meditative activity, so we advise you to stock up on a good film in advance and do the rest of the work with it. We take each stack of fibers that “stuck together” while cutting the bag, and one by one we separate them from the stack.

It is necessary to disguise the place where the throwing part is glued to the stick. To do this, we wrap the unpresentable part with a piece of fabric (with the front part facing in) and sew it with a “forward needle” or “back needle” seam - whichever is more convenient for you. Then we cut off the excess close to the edge, but so as not to damage our seam.

We remove this fabric structure, turn it right side out and return it to its place.

Evil... Got up on the wrong foot... Sat on the wrong broom... Also flew in the wrong direction...
Broom.
We take 7 (or more) bottles of one, one and a half and two liters. Preferably with the same shoulder shape.
We set aside the largest one, and cut off the bottoms of the rest and spread them up to the shoulders into ribbons about 0.5-1 cm wide
We set aside the smallest one, everything will be held on it, and we cut off the neck of the remaining ones and put them on a small blank. We cut off the neck and bottom of the largest, still intact, bottle and put it on top of our design.
Cut off the threaded ring from one of the lids. Screw the ring onto the neck. This ring holds the entire structure together. All that remains is to place the broom on the handle and secure it with a screw or nail.
| 0 | 0 | 0 |
Snowman made of padding polyester, cotton wool and a bottle of "Agushi"
Winter has come, the snow outside the windows began to fall in white fluffy flakes - which means it’s time to make winter-themed crafts with the children. Well... let's start with the snowman. This is the first thing that comes to mind from my childhood - sticky snow, a collective creation - a snow woman, and soaking wet mittens :)
We will need a piece of padding polyester for the body, cotton wool for the arms and legs of the snowman, colored paper for the bucket, carrot nose and buttons.
We wrap the bottle with padding polyester and tie it with white thread (we stuff the head with cotton wool, because the bottle has only 2 “snowballs”).
We cut out a bucket from colored paper and put it on the snowman’s head using glue. We make a carrot nose out of orange colored paper in the shape of a cone. And we also put it on glue. Eyes and buttons in the form of small circles.
You can roll the arms and legs out of cotton wool yourself, but it will be more accurate if you use ready-made cotton balls. They are smooth and the only thing you need to do is coat them with glue and glue them to the body.
That's how quickly and easily we got a snowman :)
It would be nice to make a broom into the hands of a snowman. Of what? From a small twig and old grass, which can be dug up in any yard even in winter under the snow. Here's a broom.
And the bucket on our snowman’s head and broom can be “dirty” in the snow. To do this, take a small piece of polystyrene foam, rub it with a grater and glue it onto a broom and a bucket with glue.
| 0 | 0 | 0 |
Colon cleansing with folk remedies
"lettuce broom" To prepare it you need fresh cabbage, carrots and beets. All this is taken in proportions 3:1:1.
I cook it like this: shred cabbage, grate beets and carrots. I mix everything and mash it with my hands until the juice comes out. I season the salad with vegetable oil. It turns out, however, not so much tasty as healthy.
Cleaning broom recipe
The other day I started thinking about colon cleansing again. I read an interesting and accessible way. This is exactly what I plan to implement.
To prepare, you will need 100 grams of prunes, dried apricots, raisins and stinging nettle. Everything needs to be put through a meat grinder, add 100 grams of honey, 100 ml of olive oil and mix well. The recipe says that you can add 100 grams of vodka, but I won't do that.
Store the mixture in the refrigerator. Eat 2-3 spoons at night, no earlier than three hours after dinner. It is written that in the morning you will feel the work of this product. Let's check. You need to eat the prepared mixture for a month.
I would also like to note separately that many resort to an enema to cleanse the intestines. For me this is the most extreme option, and I try not to use it. Moreover, with prolonged cleansing in this way, not only harmful, but also useful substances are removed from the body.
http://alimero.ru/blog
| 0 | 0 | 0 |
Replenishing vitamin deficiency.
Fresh vegetables are available at any time of the year. The salad is entirely vegetable and contains few calories. Due to its high fiber content, regular consumption of Broom salad cleanses and stimulates the intestines, increases hemoglobin levels, supplies provitamin A (exactly in the form in which it is absorbed by the body), and protects against respiratory infections.
Salad "Broom".
Only fresh cabbage, carrots and beets are the main ingredients. Typically the ratio in salad is approximately 3:1:1. You can add onions. The amount of onions depends on your preferences. All products must be finely chopped.
Broom salad must be seasoned with vegetable oil. Add radish, apple, and turnip to this salad. Don't forget about fresh or dried herbs.
Outdoor games. Competition for the coolest snowman. It is necessary to make a large snowman without a head, and the children, standing behind him, complete his missing part. For the most original photograph, you can take various props (a broom in your hands, or lipstick to make your cheeks more rosy, or some kind of hat) in general, whoever has enough imagination for anything... Someone takes photographs of all these creations and then at home, Over a cup of hot tea, a winner is selected from the photos taken.
| 0 | 0 | 0 |

© Sully Erna.
I make music that gets me going. If I listen to a song and jump around the living room with a broom in my hand, then I know that it will cause the same reaction in other people.
© Sully Erna.
| 0 | 0 | 0 |

Women are angels, but when their wings are broken off,
you have to fly on a broom...
WOMEN CAN FLY, BUT ON WINGS OR ON A BROOM - IT DEPENDS ON THE MAN)))